

0 - Introduction
In a previous article we setup Jenkins alongside Gitea to be able to run automations on commit, in this article we will continue where we left of and automate static analysis of your code.
If you didn’t follow the previous article, you can find it here, follow it and then come back.
1 - Install Plugin
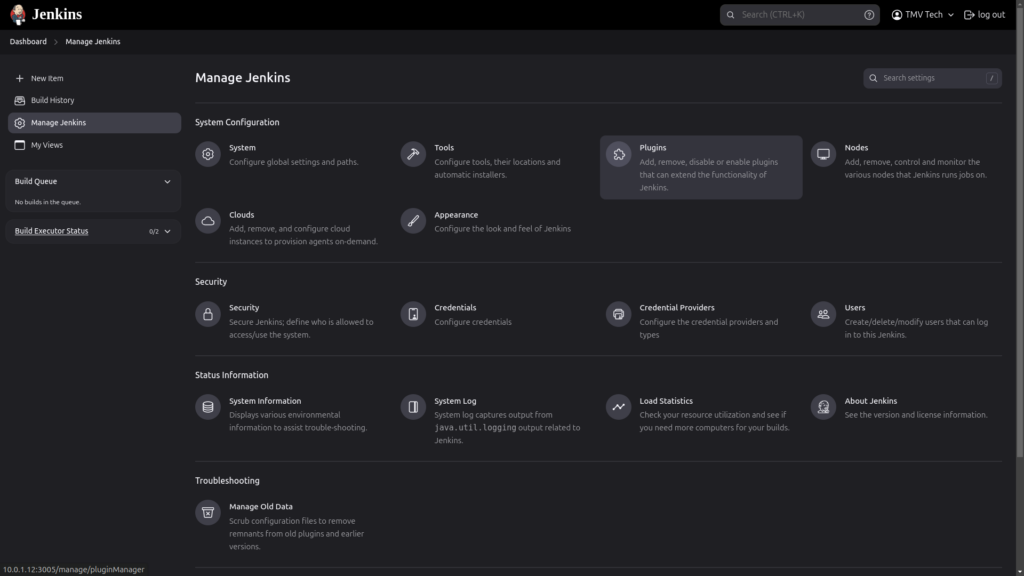
The first step we need to do after having both Gitea and Jenkins setup, is to install the Warnings plugin. This plugin lets us take reports from our code analysis tools and shows them all to us in the Jenkins page. To install the plugin go to your dashboard,
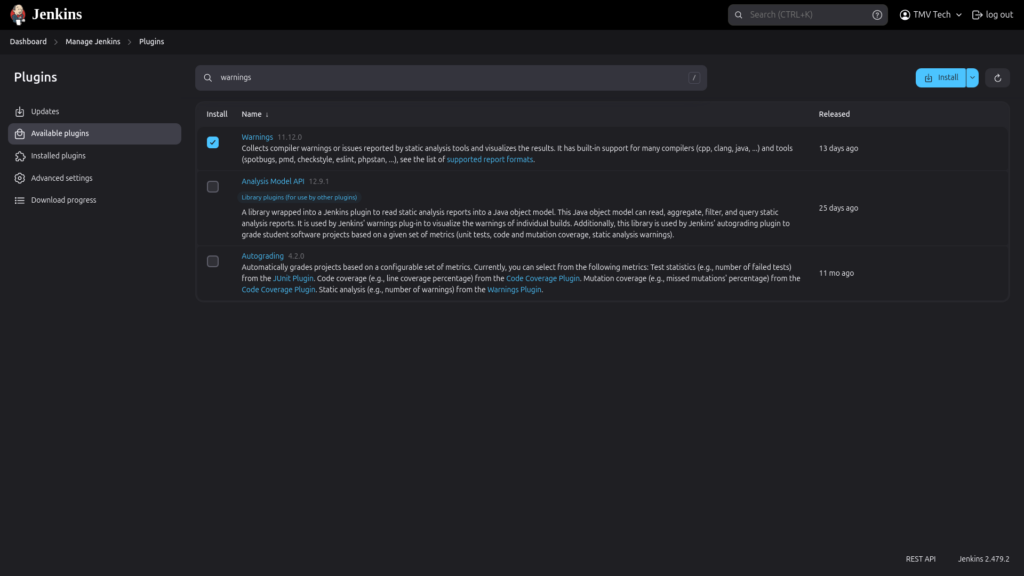
Once you get to the plugins page, select ‘Available plugins’ and search ‘Warnings’, select it and press ‘Install’.
And your Jenkins is ready, now we need to set up our project. In the docker file, we will need to install our analysers and in the jenkins file we will need to run them and publish their results.
2 - Project configuration
Below, you can find an example Makefile for C code:
# Directories and Output Names
DIR_SRC=src
DIR_OUT=out
OUT_NAME=$(DIR_OUT)/main

# ====================================================================================================
# Sources

# Find all C files in src dir (ignores test.c and main.c)
SOURCES := $(shell find $(DIR_SRC) -name '*.c') # add " ! -name 'file.c' " to remove a file
OBJECTS := $(patsubst $(DIR_SRC)/%.c, $(DIR_OUT)/%.o, $(SOURCES))

# For manual input of source files, comment above
#SOURCES := $(DIR_SRC)/util.c										\
#

# ====================================================================================================
# Compiler and Flags
CC=gcc
CC_FLAGS= -O2 -Wall #-Werror

# ====================================================================================================
# Compilation Targets

# Default target to build the executable
all: $(OUT_NAME)

# Compile .o files for each .c
$(DIR_OUT)/%.o: $(DIR_SRC)/%.c
	mkdir -p $(dir $@)
	$(CC) $(CC_FLAGS) -c -o $@ $<

# Compile the executable from source files
$(OUT_NAME): $(OBJECTS)
	$(CC) $(CC_FLAGS) -o $@ $(OBJECTS)

# ====================================================================================================
# Functions and Phony Targets

.PHONY: all, dir, run, clean

# Create output directory
dir:
	mkdir -p $(DIR_OUT)

# Run program
run:
	$(OUT_NAME)

# Remove build files
clean:
	rm -rf $(DIR_OUT)
On the docker file, we use Ubuntu 24 as a base and set the maintainer as yourself, then run ‘apt’ update and upgrade. With that, we have our base, now we need to install all the tools and compilers we will need. In here, for example, we install ‘Flawfinder’ and ‘Cppcheck’ to check our code and gcc and make to compile it:
# Base img
FROM ubuntu:noble

# Define maintainer
LABEL maintainer=TMVTech

# Update img with latest packages
RUN apt update && apt upgrade -y

# Install packages
RUN apt install -y gcc              \
                build-essential     \
                cppcheck            \
                python3             \
                flawfinder          \
                && apt clean        \
                && rm -rf /var/lib/apt/lists/*
For the jenkins file, let’s talk about it in parts, but don’t worry, at the end you can find the whole file.
Let’s start by setting up our agent. Instead of running the builds and analysis directly on your agent, we will use the Dockerfile we just set up:
agent { dockerfile true }The first stage will be the ‘Build’, in it we will run ‘make clean’ to delete the previous output folder and then we will run ‘make all’ to compile the program again. You should notice on the last command ‘2> gcc-report.txt’, that saves all output from stderr into a file with that name:
stage ('Build')
{
    steps
    {
        echo 'Starting Build...'

        // Delete old out folder
        sh 'make clean'

        // Run make to build the C program (send output to gcc-report.txt)
        sh 'make all 2> gcc-report.txt'
    }
}
On the analysis stage, we run our analysers one by one (you can run them in parallel) and like with ‘make all’ before, we redirect their output to a file:
stage ('Analysis')
{
    steps
    {
        echo 'Starting Analysis...'

        // run cppcheck and output to cppcheck-report.xml
        sh 'cppcheck --enable=all --xml --xml-version=2 --suppress=missingIncludeSystem --suppress=checkersReport ./src 2> cppcheck-report.xml || true'
        // run flawfinder and output to flawfinder-report.txt
        sh 'flawfinder ./src > flawfinder-report.txt || true'
    }
}
On the run stage, we set the compiled program as executable and we run it:
stage ('Run')
{
    steps
    {
        echo 'Starting Run...'

        // Set as executable
        sh 'chmod +x ./out/main'

        // Run
        sh './out/main'
    }
}
On post, we will use the function ‘recordIssues’ from the warnings plugin to save the warnings from gcc and the other tools:
post
{
    always
    {
        recordIssues tools: [
            gcc(id: 'gcc', name: 'GCC', pattern: 'gcc-report.txt'),
            cppCheck(id: 'cppcheck', name: 'Cppcheck', pattern: 'cppcheck-report.xml'),
            flawfinder(id: 'flawfinder', name: 'Flawfinder',pattern: 'flawfinder-report.txt')
        ]
    }
}
And that’s it, now if you start coding and pushing commits, you should be getting reports on your code’s quality!
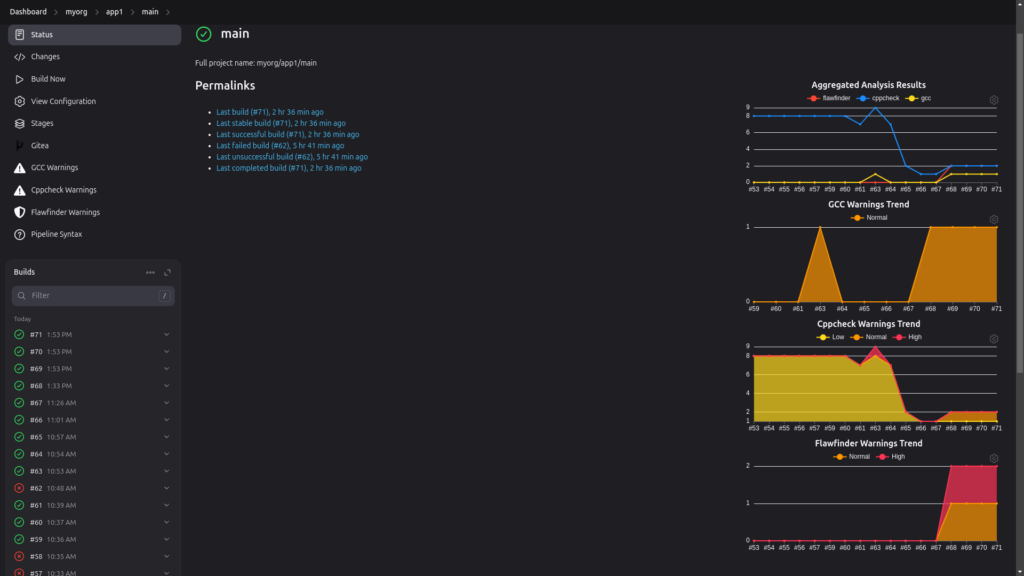
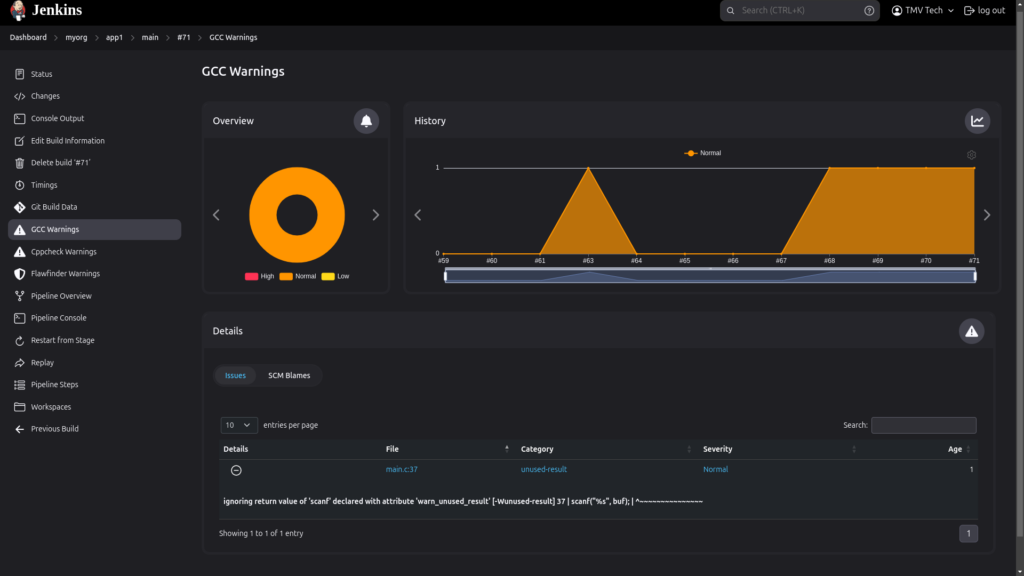
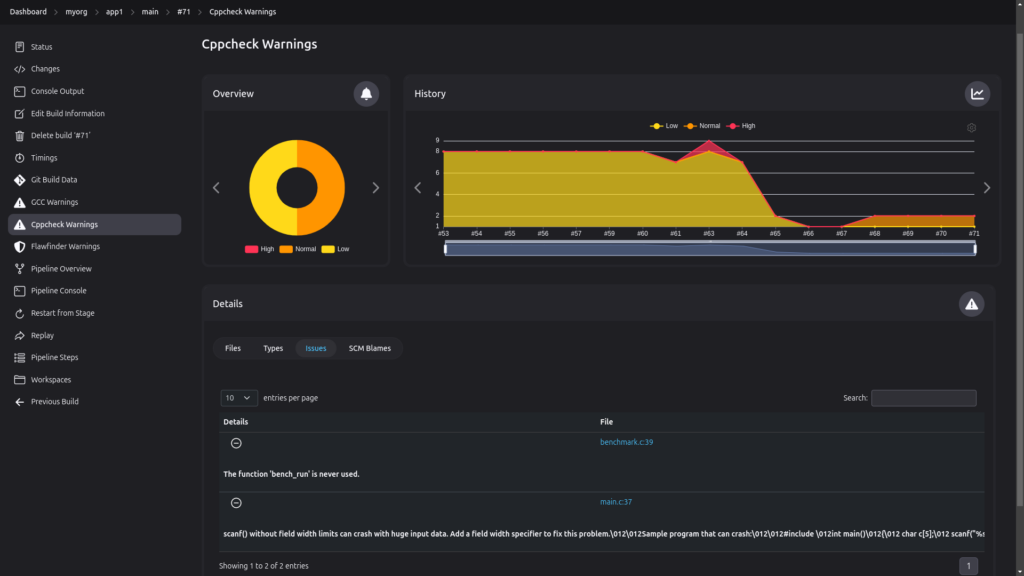
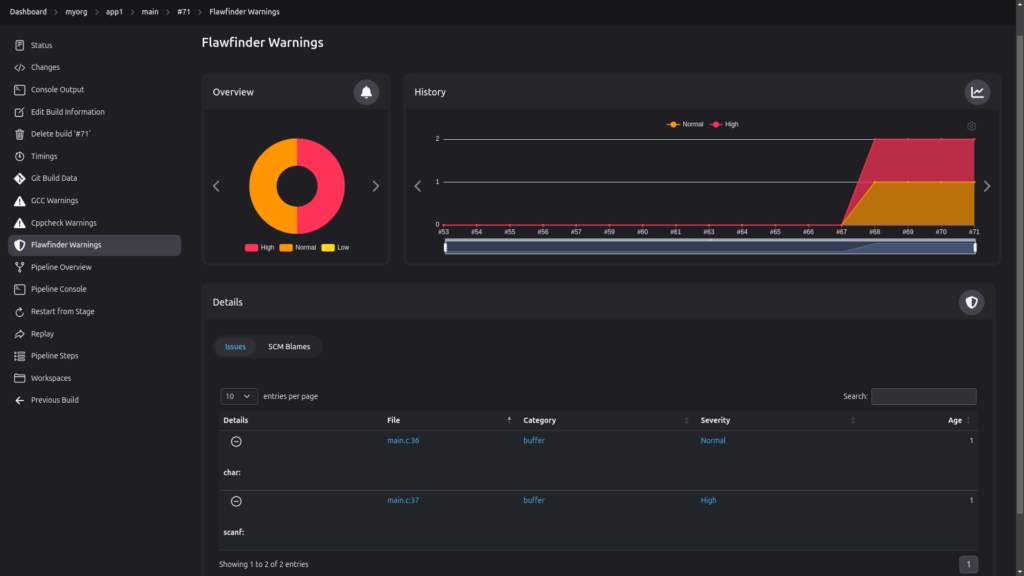
On Jenkins, in your project’s tab, you should see some graphs showcasing the ammount of warnings per analyser tool, if you look at the left bar, then you should see ‘GCC Warnings’, ‘Cppcheck Warnings’ and ‘Flawfinder Warnings’.
And that’s all for this article, below you can find the complete Jenkinsfile. Thanks for reading until the end and stay tuned for more tech insights and tutorials. Until next time, and keep exploring the world of tech!
pipeline
{
    agent { dockerfile true }
    stages
    {
        stage ('Build')
        {
            steps
            {
                echo 'Starting Build...'

                // Delete old and create new out folder
                sh 'rm -rf out && mkdir out -p'

                // Run make to build the C program (assuming Makefile is in the repository)
                sh 'make all 2> gcc-report.txt'
            }
        }
        stage ('Analysis')
        {
            steps
            {
                echo 'Starting Analysis...'

                sh 'cppcheck --enable=all --xml --xml-version=2 --suppress=missingIncludeSystem --suppress=checkersReport ./src 2> cppcheck-report.xml || true'
                sh 'flawfinder ./src > flawfinder-report.txt || true'
            }
        }
        stage ('Run')
        {
            steps
            {
                echo 'Starting Run...'

                // Set as executable
                sh 'chmod +x ./out/main'

                // Run
                sh './out/main'
            }
        }
    }
    post
    {
        always
        {
            recordIssues tools: [
                gcc(id: 'gcc', name: 'GCC', pattern: 'gcc-report.txt'),
                cppCheck(id: 'cppcheck', name: 'Cppcheck', pattern: 'cppcheck-report.xml'),
                flawfinder(id: 'flawfinder', name: 'Flawfinder',pattern: 'flawfinder-report.txt')
            ]
        }
    }
}