
0 - Introduction
In modern software development, ensuring code reliability and quality is crucial, which makes unit testing essential, by validating individual components of your codebase, it helps you catch bugs and other problems between every commit. In this article we will use Jenkins with the JUnit plugin and pytest to implement unit tests for python, so make sure to follow this article to learn how to install Jenkins and make sure you have the JUnit plugin installed.
1 - Code
Before we start to mess with Jenkins, we will do everything on your local machine. Below you can find the structure of the project folder we will create. The files ‘Dockerfile’ and ‘Jenkinsfile’ will be created once we get to messing with Jenkins:
- src:
  - myfile.py
- test:
  - test_myfile.py
- Dockerfile  (for later)
- Jenkinsfile (for later)
- requirements.txt
On the file ‘requirements.txt’ is where you set your project dependencies, in our case, we will use ‘pytest’ to run the tests, so your file needs at least the following line:
pytestWe need an example code to test, you can copy the following code to a file named ‘myfile.py’ in the ‘src’ directory:
def add(a, b):
    return a + b

def subtract(a, b):
    return a - b
As for the tests, we create a file with a name similar to ‘test_myfile.py’ in the ‘test’ folder, in that file, import the ‘unittest’ package and the functions you want to test from your file, then create a class like below, and finally if ‘__name__’ is ‘__main__’, run the unittest’s main function:
import unittest
from src.myfile import add, subtract
class TestMymath(unittest.TestCase):
def test_add(self):
self.assertEqual(add(2, 3), 5)
self.assertEqual(add(-1, 1), 0)
self.assertEqual(add(0, 0), 0)
def test_subtract(self):
self.assertEqual(subtract(5, 3), 2)
self.assertEqual(subtract(0, 1), -1)
self.assertEqual(subtract(10, 9), 1)
if __name__ == '__main__':
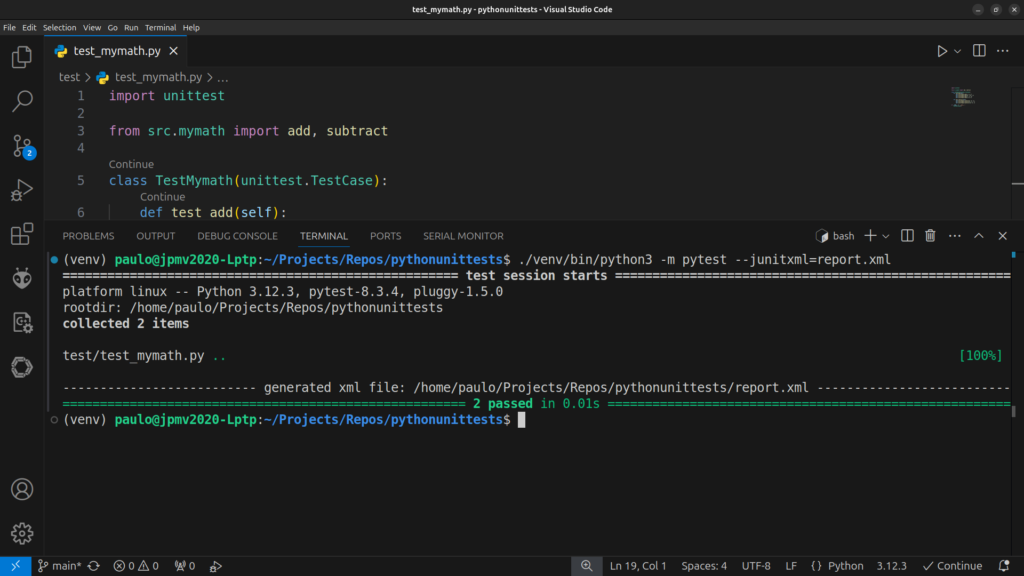
unittest.main()On your terminal, you can try the following commands to run the tests:
python3 -m venv venv
. venv/bin/activate
./venv/bin/pip install -r requirements.txt

./venv/bin/python3 -m pytest --junitxml=report.xml
After you run the commands, you should get the results on your terminal as well as a file named ‘report.xml’ with the results of the test:
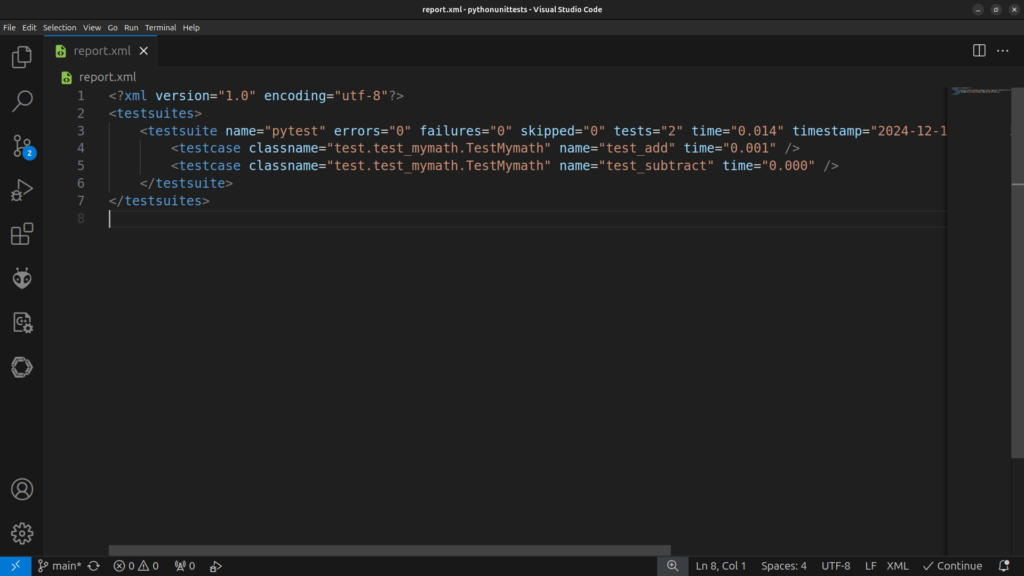
In your project now, you should have some folders that should not be commited to git so you can take the following git ignore as an example of what you can safely ignore:
venv/
.pytest_cache
**/__pycache__/
report.xml
1 - Setup on Jenkins
Now that we have tested the tests, we can start setting up Jenkins. Let’s start with the dockerfile, use Ubuntu 24 as a base, install the required packages and set ‘python3’ as the default python:
# Use Ubuntu 24.04 as the base image
FROM ubuntu:noble

# Set environment variables to avoid interactive prompts during installation
ENV DEBIAN_FRONTEND=noninteractive

# Update package list and install required dependencies
RUN apt-get update && apt-get install -y \
    python3 \
    python3-pip \
    python3-venv \
    git \
    curl \
    unzip \
    && apt-get clean \
    && rm -rf /var/lib/apt/lists/*

# Set Python3 as the default python command
RUN update-alternatives --install /usr/bin/python python /usr/bin/python3 1
As for our Jenkinsfile, it will contain two stages and a post stage. The first stage is the Setup, in this one we will create our virtual environment, activate it and then install the dependencies in the ‘requirements.txt’ file. Our second stage will be the Test stage, in this one, we will again, activate the virtual environment, make a folder for the reports and then run pytest. Finally, on ‘post always’, we will publish the results of the tests with the JUnit plugin.
pipeline
{
agent { dockerfile { reuseNode true } }
stages
{
stage ('Setup')
{
steps
{
echo 'Running setup...'
sh '''
python3 -m venv venv
. venv/bin/activate
./venv/bin/pip install -r requirements.txt
'''
}
}
stage ('Tests')
{
steps
{
echo 'Running tests...'
sh '''
. venv/bin/activate
mkdir -p test-reports
./venv/bin/python3 -m pytest --junitxml=test-reports/report.xml
'''
}
}
}
post
{
always
{
junit 'test-reports/*.xml'
}
}
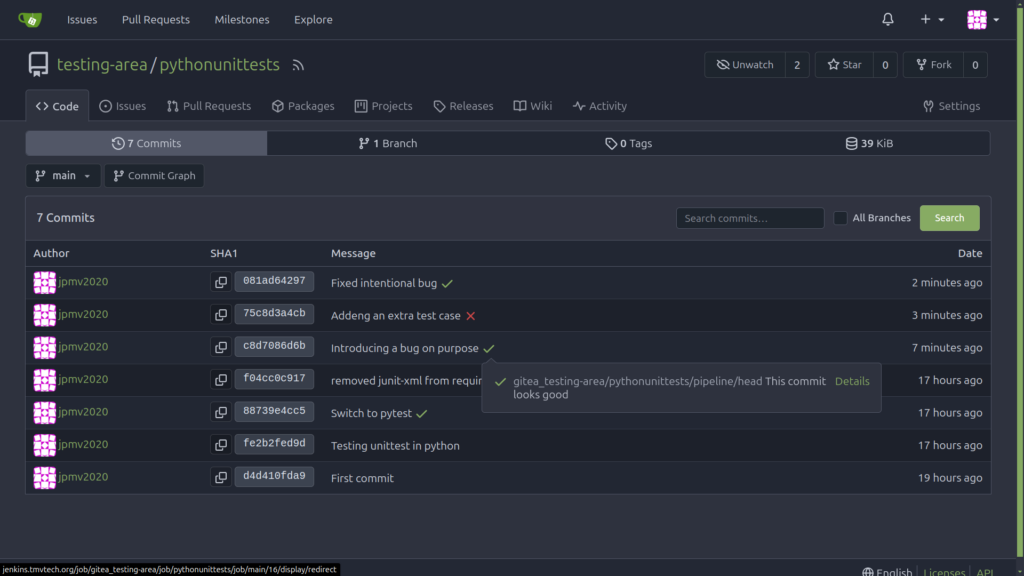
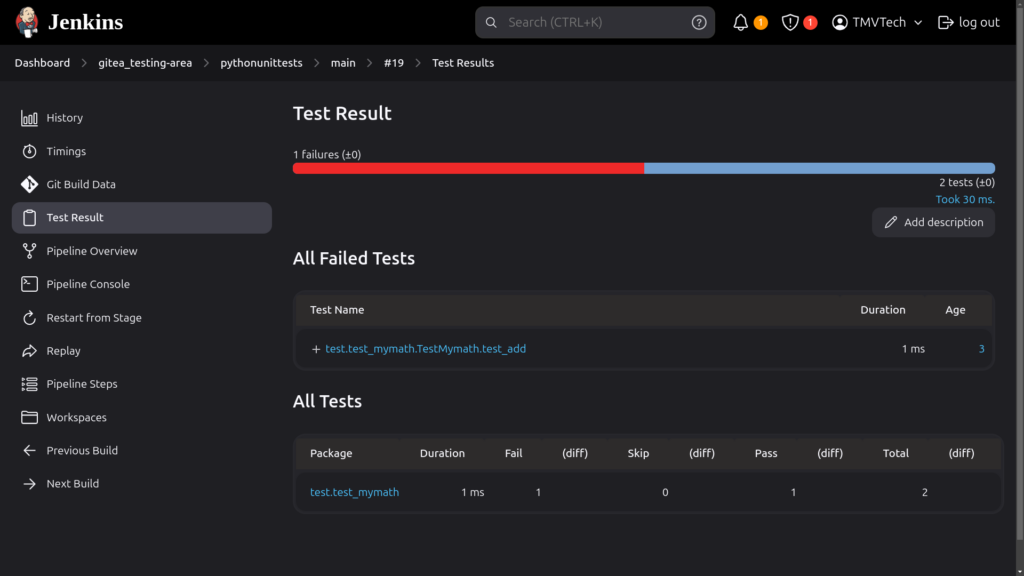
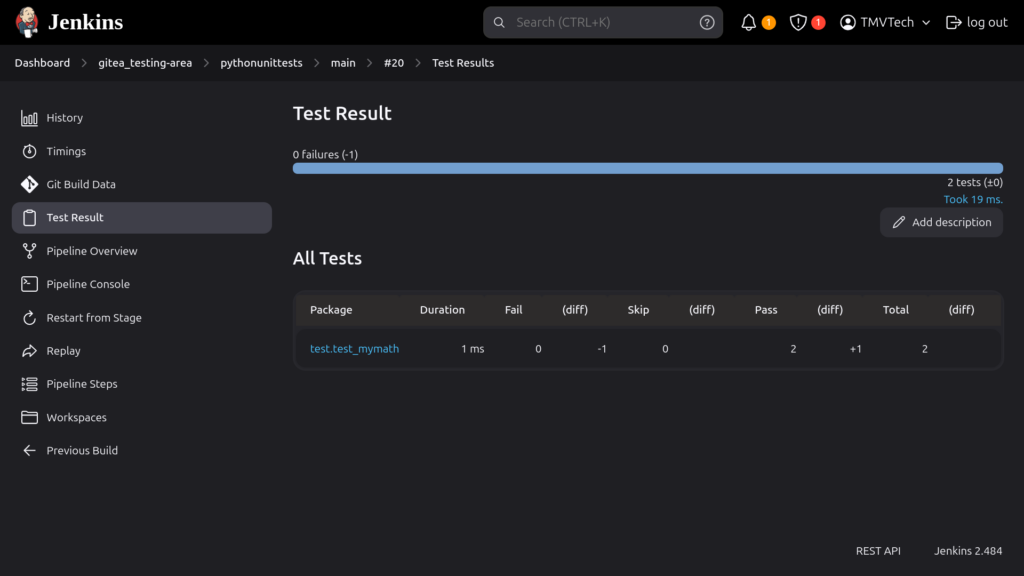
}And that’s it, on Gitea you should now see either a checkmark or a cross on your commits and on Jenkins you can get details on the tests and see the logs of the running builds. Below, you can check some screenshots of what you can expect:

Thanks for reading and stay tuned for more tech insights and tutorials. Until next time, and keep exploring the world of tech!