
In this tutorial, we will explore how to interface an ESP32 microcontroller with a GC9A01 round TFT display. The project covers hardware connections and software setup using VS Code and PlatformIO. By the end, you’ll learn how to render colors, draw shapes, and optimize performance using a framebuffer.
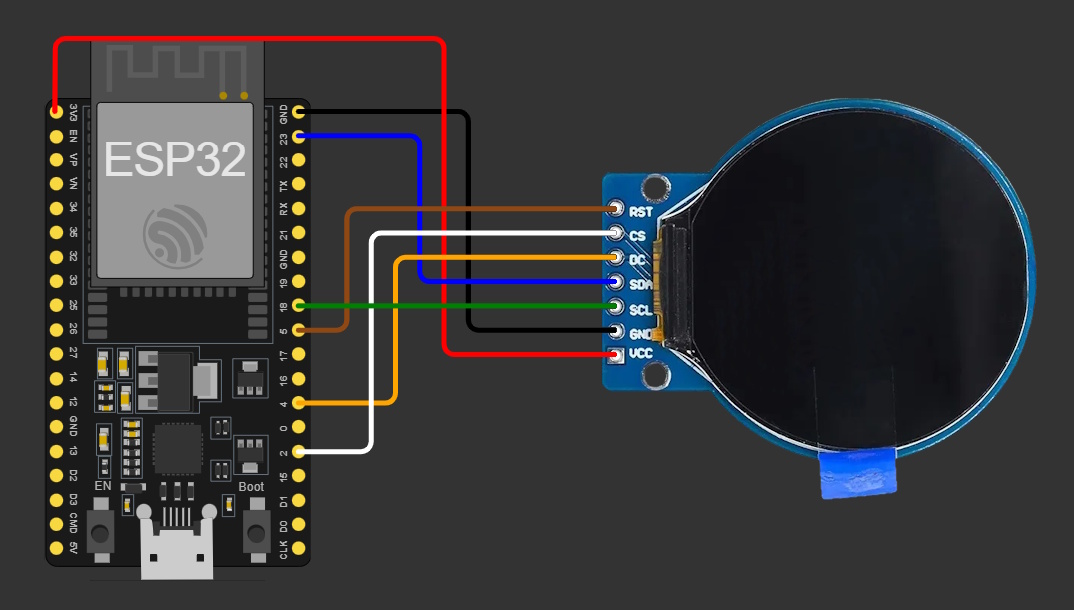
For this project, we will need an Esp32 and a GC9A01 round display. Connect the display’s VCC to 3.3V, ground to ground, SCL to pin 18, SDA to pin 23, DC to 4, CS to 2 and RST to 5:
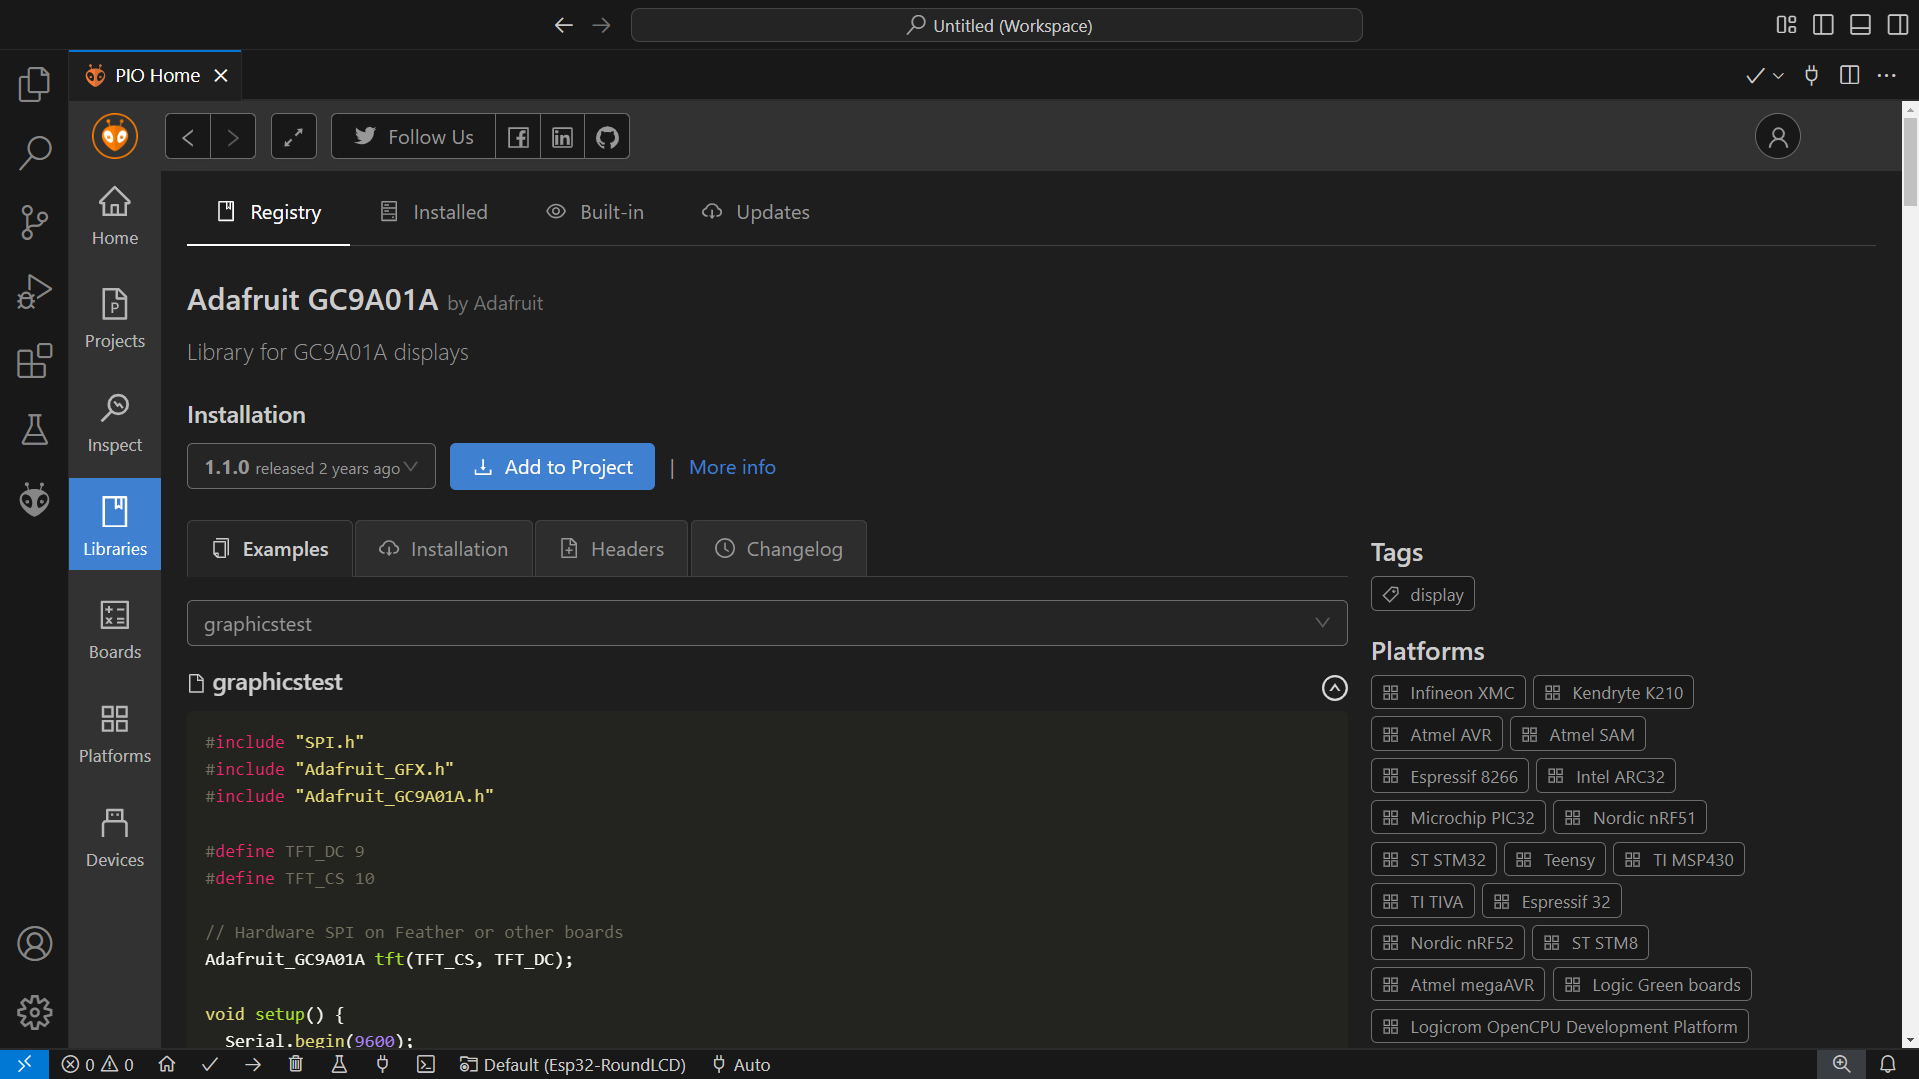
We will use VSCode with the PlatformIO extension and in it, the Adafruit GC9A01A library.
The first thing we need to do to code our program is to include the Arduino, SPI and the Adafruit headers, then we create the display with the CS, DC and Reset pins:
#include <Arduino.h>
#include <SPI.h>
#include <Adafruit_GC9A01A.h>

Adafruit_GC9A01A disp(GPIO_NUM_2, GPIO_NUM_4, GPIO_NUM_5);
Like we did in one of our previous articles about TFT displays, we will create the ‘fromRGB’ method that will convert a normal RGB (8-8-8) value to the display’s 16bit RGB (5-6-5):
// Convert a 24bit (8-8-8) RGB value to 16bit (5-6-5)
uint16_t fromRGB(uint8_t r, uint8_t g, uint8_t b)
{
    uint16_t rs = (r * 0b11111) / 0xFF;
    uint16_t gs = (g * 0b111111) / 0xFF;
    uint16_t bs = (b * 0b11111) / 0xFF;

    return ((rs << 11) | (gs << 5) | bs);
}
On loop we fill the screen with TMVTech’s blue, wait a second, fill it with another blue and wait another second:
void loop()
{
    disp.fillScreen(fromRGB(0x53, 0x7A, 0xD3));
    vTaskDelay(1000 / portTICK_PERIOD_MS);

    disp.fillScreen(GC9A01A_BLUE);
    vTaskDelay(1000 / portTICK_PERIOD_MS);
}
Now that you know your display works, you can use functions like the ones below to draw all the graphics you might need:
disp.drawPixel(x0, y0, color);
disp.drawLine(x0, y0, x1, y1, color);
disp.drawRect(x0, y0, w, h, color);
disp.drawCircle(x0, y0, r, color);
disp.drawBitmap(x0, y0, bmp, w, h, color);If you want to make games or any other type of program that requires fast updates to your screen, a frame buffer is probably a good idea. To add one to your project, create the following variable at the top of your file, near your display driver:
// Display driver    (    CS    ,     DC    ,    RST    )
Adafruit_GC9A01A disp(GPIO_NUM_2, GPIO_NUM_4, GPIO_NUM_5);
// Frame buffer
GFXcanvas16 canvas(GC9A01A_TFTWIDTH, GC9A01A_TFTHEIGHT - 2);
In this new canvas you can draw to it with the same function the display has, but it won’t update the display, to do it run:
disp.drawRGBBitmap(0, 0, canvas.getBuffer(), canvas.width(), canvas.height());As you probably noticed, when we declared the frame buffer, we didn’t make one with the same size as the display (240 by 240). That is because I get crashes if I try to create a frame buffer bigger than the one above. The sizes that work for me are 240 by 238, 238 by 240, 239 by 239 or anything smaller. 240 by 240 or 240 by 239 crash my ESP.
Now, on loop, we can then do the same as we were doing before but to the canvas:
void loop()
{
    canvas.fillScreen(fromRGB(0x53, 0x7A, 0xD3));
    disp.drawRGBBitmap(0, 0, canvas.getBuffer(), canvas.width(), canvas.height());
    vTaskDelay(1000 / portTICK_PERIOD_MS);

    canvas.fillScreen(GC9A01A_BLUE);
    disp.drawRGBBitmap(0, 0, canvas.getBuffer(), canvas.width(), canvas.height());
    vTaskDelay(1000 / portTICK_PERIOD_MS);
}And that’s all, thanks for reading and stay tuned for more tech insights and tutorials. Until next time, and keep exploring the world of tech!