
In modern software development, automation is the backbone of efficient workflows. By integrating Jenkins, a robust CI/CD tool, with CMake and Google Test (GTest), developers can automate the compilation and testing of C and C++ projects. This setup ensures that your code is always in a buildable state and that unit tests run consistently, catching issues early in the development cycle. Whether you’re maintaining legacy systems or building new applications, automating these tasks saves time, reduces human error, and boosts confidence in code quality. In this article, we’ll walk through the process of setting up Jenkins to run C and C++ unit tests using CMake and GTest.
Before following this article, check out this one on how to install and setup Jenkins with Gitea and make sure you have the JUnit plugin installed on Jenkins.
Before implementing the tests in Jenkins, let’s first learn how to run them locally. The following is the structure of files you will need:
- src:
    - add:
        - add.cpp
        - add.h
        - CMakeLists.txt
    - cprint:
        - cprint.c
        - cprint.h
        - CMakeLists.txt
    - multiply:
        - multiply.cpp
        - multiply.h
        - CMakeLists.txt
    - main.cpp
    - CMakeLists.txt
- test:
    - add_test.cpp
    - multiply_test.cpp
    - CMakeLists.txt
- CMakeLists.txt
- _bint.sh
- _build.sh
- _run_main.sh
- _run_tests.sh
The first thing we will do is to create the cmake file at the root of the directory, in it, we set export compile commands (helps intellisense on vscode), we set the standards for C and Cpp, set the compiler flags, set the project name and languages, enable testing and add the subdirectories:
# ./CMakeLists.txt
cmake_minimum_required(VERSION 3.28)

# lang settings
set(CMAKE_EXPORT_COMPILE_COMMANDS ON)

set(CMAKE_C_STANDARD 23)
set(CMAKE_C_STANDARD_REQUIRED ON)
set(CMAKE_C_EXTENSIONS OFF)

set(CMAKE_CXX_STANDARD 23)
set(CMAKE_CXX_STANDARD_REQUIRED ON)
set(CMAKE_CXX_EXTENSIONS OFF)

# Compiler flags
set(CMAKE_C_COMPILER "/usr/bin/gcc")
set(CMAKE_C_FLAGS "-O -Wall -Werror")

set(CMAKE_CXX_COMPILER "/usr/bin/g++")
set(CMAKE_CXX_FLAGS "-O -Wall -Werror")

# Project
project(MyTestApp LANGUAGES C CXX)

# subdirs
add_subdirectory(src)

enable_testing()
add_subdirectory(test)
Now we will make a couple of bash scripts to compile and run your program:
#! /bin/bash
# ./_bint.sh
# runs cmake, updates our intellisense
mkdir -p build
cd build
cmake ..
cd ..
#! /bin/bash
# ./_build.sh
# runs cmake and compiles the project
mkdir -p build
cd build
cmake ..
cmake --build .
cd ..
#! /bin/bash
# ./_run_main.sh
# runs your program
cd build
./src/main
cd ..
#! /bin/bash
# ./_run_tests.sh
# runs the tests
cd build
ctest --output-junit ./test.xml
cd ..
With the root of the project ready, let’s move into the source directory, in it, create the cmake file with the contents below. In this file, we first add all the subdirectories, then add the executable with all the cpp files in the source folder and then link all subdirectories:
# ./src/CMakeLists.txt
# add subdirs
add_subdirectory(add)
add_subdirectory(cprint)
add_subdirectory(multiply)

# add cpp files
add_executable(main
    main.cpp
    # add cpp files here
)

# link
target_link_libraries(main
    PRIVATE add
    PRIVATE cprint
    PRIVATE multiply
    # add libs (folders) here
)
Now we create the subdirectories with the following contents on each:
// ./src/add/add.h
#ifndef _add_h_
#define _add_h_

int add(int a, int b);

#endif
// ./src/add/add.cpp
#include "add.h"

int add(int a, int b)
{
    return a + b;
}
# ./src/add/CMakeLists.txt
# add cpp files
add_library(add
    add.cpp
)

# add header files
target_include_directories(add PUBLIC ${CMAKE_CURRENT_SOURCE_DIR})
// ./src/cprint/cprint.h
#ifndef _cprint_h_
#define _cprint_h_

#ifdef __cplusplus
extern "C" {
#endif

int cprint(const char* str);

#ifdef __cplusplus
}
#endif

#endif
// ./src/cprint/cprint.c
#include "cprint.h"
#include <stdio.h>

int cprint(const char* str)
{
    return printf("%s", str);
}
# ./src/cprint/CMakeLists.txt
# add cpp files
add_library(cprint
    cprint.c
)

# add header files
target_include_directories(cprint PUBLIC ${CMAKE_CURRENT_SOURCE_DIR})
// ./src/multiply/multiply.h
#ifndef _multiply_h_
#define _multiply_h_

int multiply(int a, int b);

#endif
// ./src/multiply/multiply.cpp
#include "multiply.h"

int multiply(int a, int b)
{
    return a * b;
}
# ./src/multiply/CMakeLists.txt
# add cpp files
add_library(multiply
    multiply.cpp
)

# add header files
target_include_directories(multiply PUBLIC ${CMAKE_CURRENT_SOURCE_DIR})
With our ‘libraries’ done, we can now make the main file, in it we will make some random calculations using the functions in the ‘libraries’:
// ./src/main.cpp
#include <iostream>
#include "add/add.h"
#include "multiply/multiply.h"
#include "cprint/cprint.h"

int main()
{
    int a = add(1, 2);
    int b = multiply(a, 3);
    std::cout << "Hello " << a << b << "\n";
    cprint("Hello World\n");
    return 0;
}
Going into the test folder, we will create another cmake file that will get GoogleTests, compile our executables and register the tests:
# ./test/CMakeLists.txt
include(FetchContent)

# Get GTest
FetchContent_Declare(
    googletest
    GIT_REPOSITORY https://github.com/google/googletest.git
    GIT_TAG        release-1.11.0
)
FetchContent_MakeAvailable(googletest)
add_library(GTest::GTest INTERFACE IMPORTED)
target_link_libraries(GTest::GTest INTERFACE gtest_main)

include(GoogleTest)

# multiply test
add_executable(multiply_test multiply_test.cpp)
target_link_libraries(
    multiply_test
    PRIVATE
    gtest_main
    multiply
)
gtest_discover_tests(multiply_test)
# add test
add_executable(add_test_ add_test.cpp)
target_link_libraries(
    add_test_
    PRIVATE
    gtest_main
    add
)
gtest_discover_tests(add_test_)
On each of your test files, you need to include the library you want to test and ‘gtest’, then you declare a test, give it a test suite name (can be file name) and a test name (what the test does), for example, in the following file, we give named the suite ‘Add:_Test’ and each test tells us what it is testing (positive numbers, zeroes and negatives):
// ./test/add_test.cpp
#include <add.h>
#include <gtest/gtest.h>

TEST(Add_Test, Positive)
{
    ASSERT_EQ(2, add(1, 1));
    ASSERT_EQ(3, add(1, 2));
    ASSERT_EQ(11, add(1, 10));
    ASSERT_EQ(3, add(2, 1));
    ASSERT_EQ(11, add(10, 1));
}

TEST(Add_Test, Zero)
{
    ASSERT_EQ(0, add(0, 0));
    ASSERT_EQ(5, add(0, 5));
    ASSERT_EQ(3, add(3, 0));
}

TEST(Add_Test, Negative)
{
    ASSERT_EQ(0, add(1, -1));
    ASSERT_EQ(0, add(-2, 2));
    ASSERT_EQ(-11, add(-1, -10));
}
The other test file is pretty similar, we just switch the suite name, include the other library and change the test values:
// ./test/multiply_test.cpp
#include <multiply.h>
#include <gtest/gtest.h>

TEST(Multiply_Test, Positive)
{
    ASSERT_EQ(1, multiply(1, 1));
    ASSERT_EQ(2, multiply(1, 2));
    ASSERT_EQ(10, multiply(1, 10));
    ASSERT_EQ(2, multiply(2, 1));
    ASSERT_EQ(10, multiply(10, 1));
}

TEST(Multiply_Test, Zero)
{
    ASSERT_EQ(0, multiply(0, 0));
    ASSERT_EQ(0, multiply(0, 5));
    ASSERT_EQ(0, multiply(3, 0));
}

TEST(Multiply_Test, Negative)
{
    ASSERT_EQ(-1, multiply(1, -1));
    ASSERT_EQ(-4, multiply(-2, 2));
    ASSERT_EQ(10, multiply(-1, -10));
}
With every file ready, let’s now run the build script, you should get an output similar to this one:
./_build.sh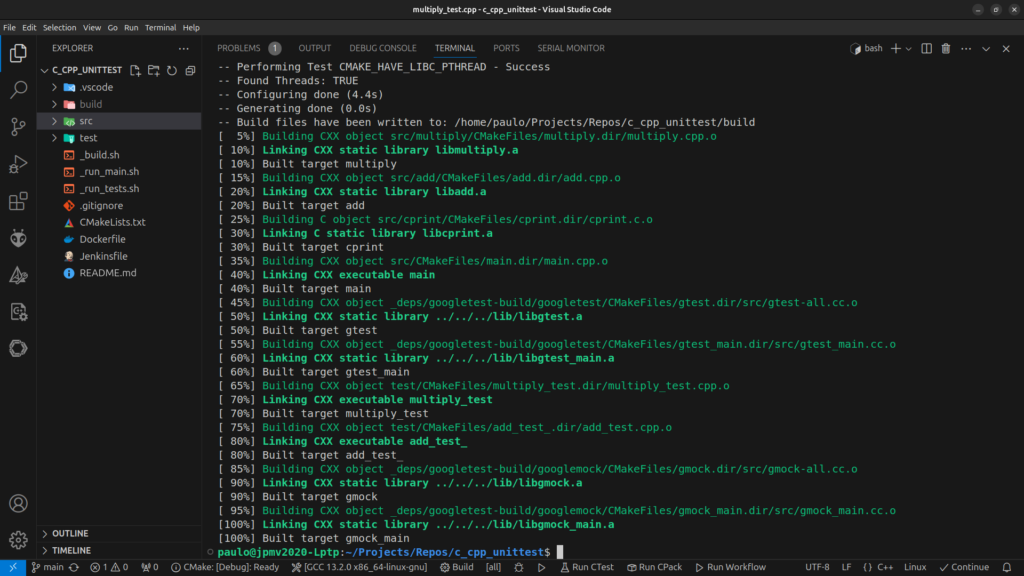
After compiling your program, you can now run it and the tests:
./_run_main.sh
./_run_tests.sh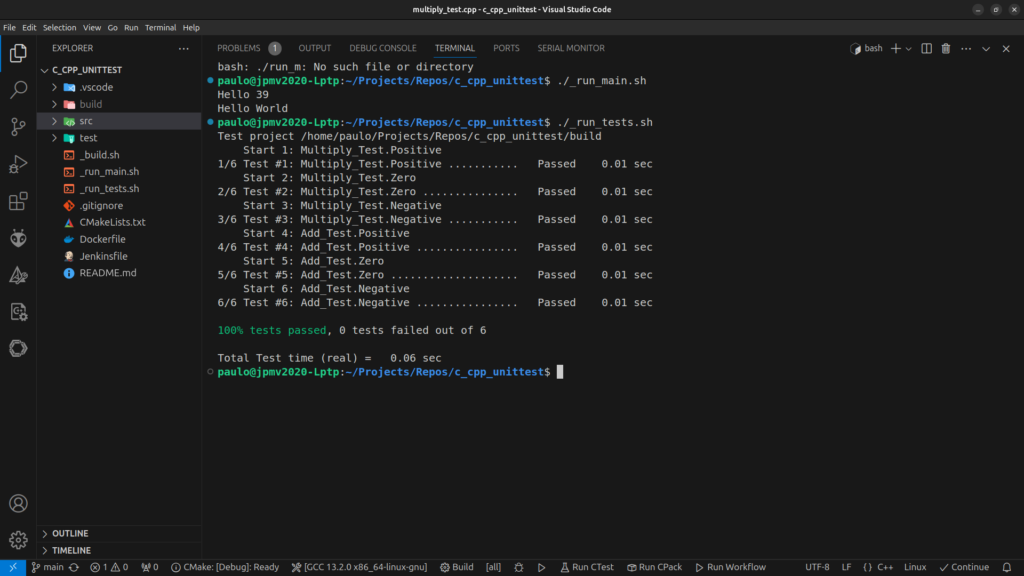
2 - Setup Jenkins
Now that we have the tests working, let’s add them to our Jenkins Pipeline. Start by creating a docker file where we will install cmake and some other packages to help our development:
# Use Ubuntu 24.04 as the base image
FROM ubuntu:noble

# Set environment variables to avoid interactive prompts during installation
ENV DEBIAN_FRONTEND=noninteractive

# Update package list and install required dependencies
RUN apt-get update && apt-get install -y \
    build-essential \
    cmake \
    git \
    curl \
    unzip \
    && apt-get clean \
    && rm -rf /var/lib/apt/lists/*
On our Jenkins file, we will set the agent to use the docker file and, if possible, reuse the build folder (to speed up compilation) then we will have 3 stages, one to run the build script, one for the tests and the last one to run the program. After the stages, on publish always, we will publish the results of the tests using the JUnit plugin.
pipeline
{
    agent { dockerfile { reuseNode true } }
    stages
    {
        stage ('Build')
        {
            steps
            {
                sh './_build.sh'
            }
        }
        stage ('Test')
        {
            steps
            {
                sh './_run_tests.sh'
            }
        }
        stage ('Run')
        {
            steps
            {
                sh './_run_main.sh'
            }
        }
    }
    post
    {
        always
        {
            junit 'build/test.xml'
        }
    }
}
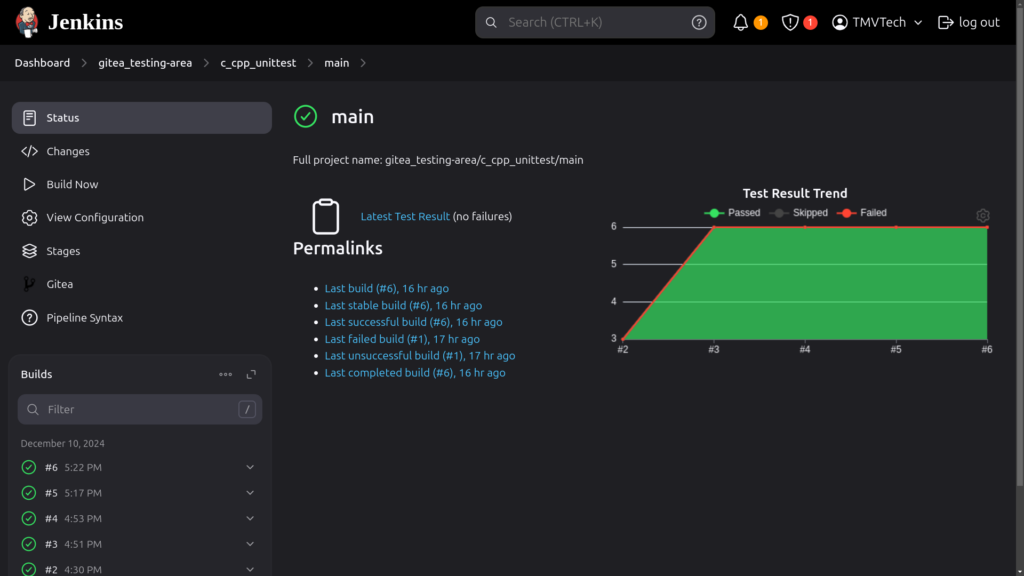
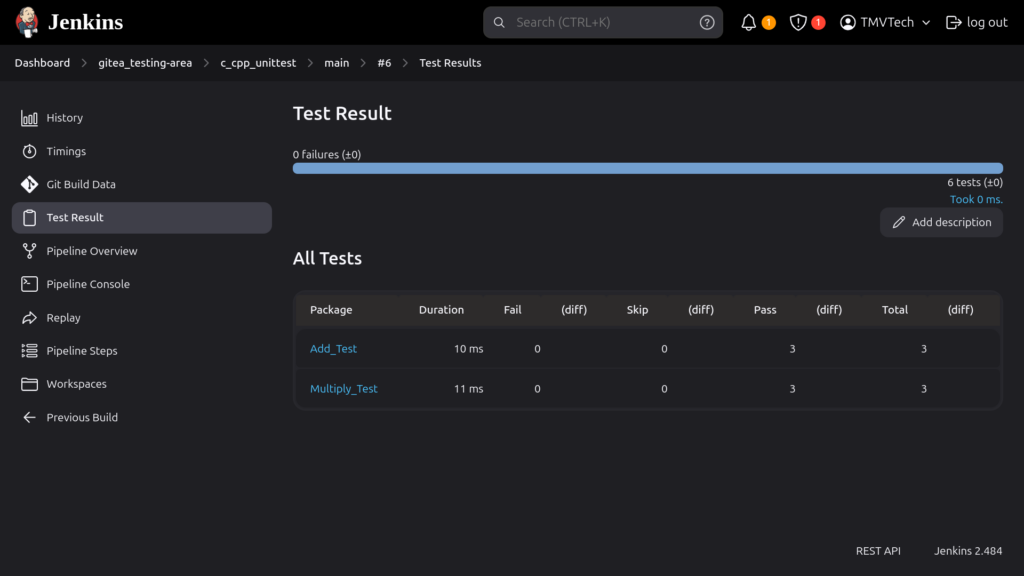
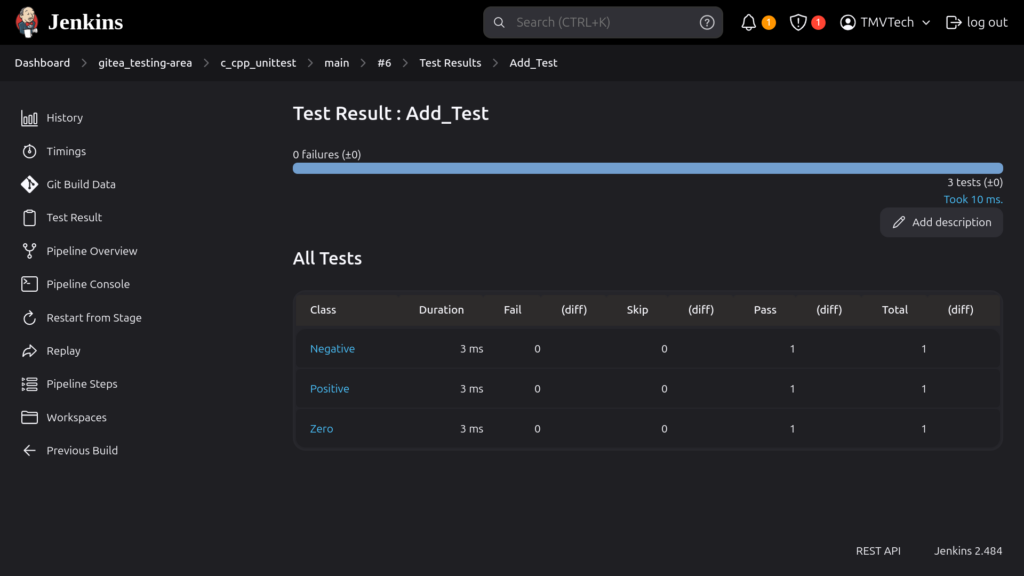
Now if you make a commit, you should see your build being ran on Jenkins and after it finishes, you can check the test results:

And that’s it, thanks for reading and stay tuned for more tech insights and tutorials. Until next time, keep exploring the world of tech!