

0 - Introduction
Podman is an open-source tool revolutionizing the way we manage and run containers. Developed by Red Hat, Podman stands out with its daemonless architecture, offering a more secure and efficient approach to container management. With support for rootless containers allows users to run containers without requiring superuser privileges. Additionally, its compatibility with Docker‘s command-line interface makes it easy for users to transition to this more secure and flexible alternative.
1 - Setup
Open a terminal or connect via SSH to your machine and run the following commands to update it:
sudo apt update
sudo apt upgrade
With your system updated, let’s install Podman:
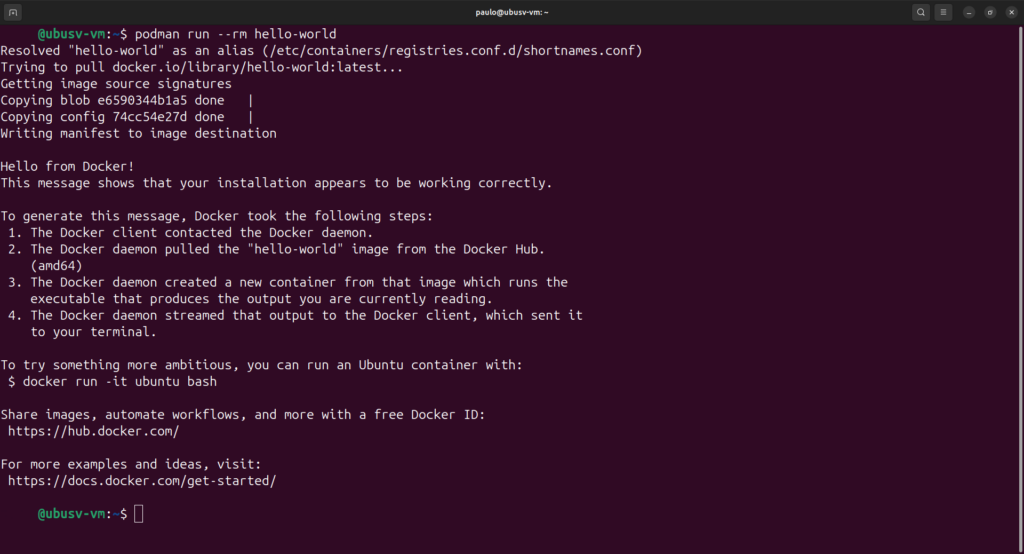
sudo apt install podmanAfter installing Podman you can run the hello world image with Podman:
podman run hello-worldYou might find weird what happens after you run the command. Pulling from ‘docker.io’? ‘Hello from Docker’? Why is Podman running a Docker image? That is because both Podman and Docker are based on the OCI standard, that means that lots of images should run on Podman without any modifications.
2 - Podman Compose
If you follow our Docker tutorials, you might’ve noticed that we usually use docker compose to manage our containers, gladly, there is also a package called ‘podman-compose’ that adds most of its functionality:
sudo apt install podman-composeNow let’s try, for example NGINX, copy the following to a file named ‘docker-compose.yml’:
services:
  app:
    image: 'jc21/nginx-proxy-manager:latest'
    restart: unless-stopped
    ports:
      - '80:80'
      - '81:81'
      - '443:443'
    volumes:
      - ./data/data:/data
      - ./data/letsencrypt:/etc/letsencrypt
After saving the file, try running:
podman-compose upThe first error you should notice, would be something like this:
Error: short-name "jc21/nginx-proxy-manager:latest" did not resolve to an alias and no unqualified-search registries are defined in "/etc/containers/registries.conf"This error happens because we don’t have the image yet, to get it run:
podman image pull docker.io/jc21/nginx-proxy-manager:latestThen try running it again:
podman-compose upThis time you get the following error:
Error: unable to start container 4cb9f3d42fc66c06fc313ed93ca99547ecb109f154aeeaa4ec4bcb72a10da290: rootlessport cannot expose privileged port 80, you can add 'net.ipv4.ip_unprivileged_port_start=80' to /etc/sysctl.conf (currently 1024), or choose a larger port number (>= 1024): listen tcp 0.0.0.0:80: bind: permission deniedThis time the error was caused because a container needs root to use ports below 1024 and, by default, podman containers are ran as rootless. To fix this problem there are two options, either give the user that is running the container permission to use those ports or you can also just use other ones, like in the following example:
services:
app:
image: 'jc21/nginx-proxy-manager:latest'
restart: unless-stopped
ports:
- '10080:80'
- '10081:81'
- '10443:443'
volumes:
- ./data/data:/data
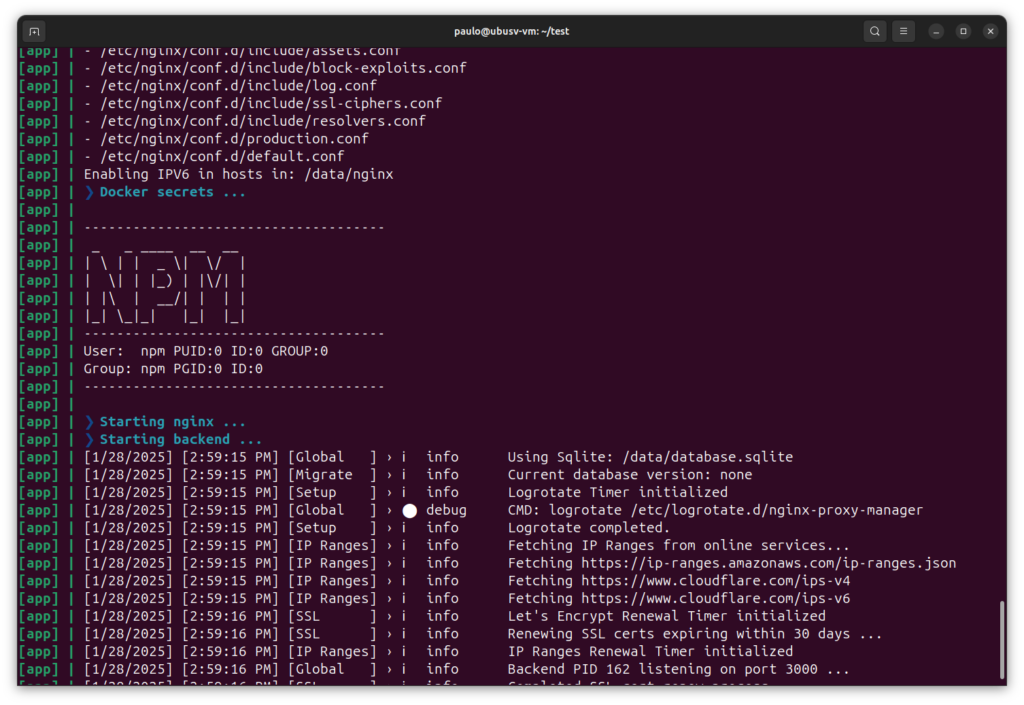
- ./data/letsencrypt:/etc/letsencryptAfter once more running:
podman-compose upWe can see our container working!
And that’s it for this article, you should now know the basics on how to use Podman, and should also be able to folow our Docker tutorials with it. Keep in mind though that not every container is going to work on the first time and there are even some that do not work at all.
Thanks for reading and stay tuned for more tech insights and tutorials. Until next time, and keep exploring the world of tech!