In today’s world, safeguarding your passwords and sensitive information is essential. Vaultwarden, a lightweight and self-hosted alternative to Bitwarden, is an excellent solution for managing your credentials securely. Its small resource footprint and compatibility with the official Bitwarden apps make it a popular choice for those looking to maintain control over their data.
Before following this article I really suggest you setup NGINX Proxy Manager as Vaultwarden requires HTTPS and public access to work.
1 - Setup
Start by making a folder for Vaultwarden and, in it, create a file named ‘docker-compose.yml’:
mkdir vaultwarden
cd vaultwarden
nano docker-compose.yml
In this file paste the configuration below, changing the required environment variables. Keep in mind that having SMTP setup is required, not an option.
services:
  vaultwarden:
    image: vaultwarden/server:latest
    container_name: vaultwarden
    restart: unless-stopped
    environment:
      DOMAIN: "https://pwd.example.com" # CHANGE THIS
      ADMIN_TOKEN: admin_password # CHANGE THIS
      WEBSOCKET_ENABLED: true
      SIGNUPS_ALLOWED: false # CHANGE THIS ONLY IF NEEDED
      INVITATIONS_ALLOWED: true
      INVITATION_ORG_NAME: orgname # CHANGE THIS
      SMTP_HOST: smtp.gmail.com
      SMTP_FROM: youremail@example.com # CHANGE THIS
      SMTP_PORT: 587
      SMTP_SECURITY: starttls
      SMTP_USERNAME: youremail@example.com # CHANGE THIS
      SMTP_PASSWORD: your_app_password # CHANGE THIS
    volumes:
      - ./data/:/data
    ports:
      - "10081:80"
After saving the file (CTRL-O and CTRL-X), run the following command to start the container:
docker compose up -d
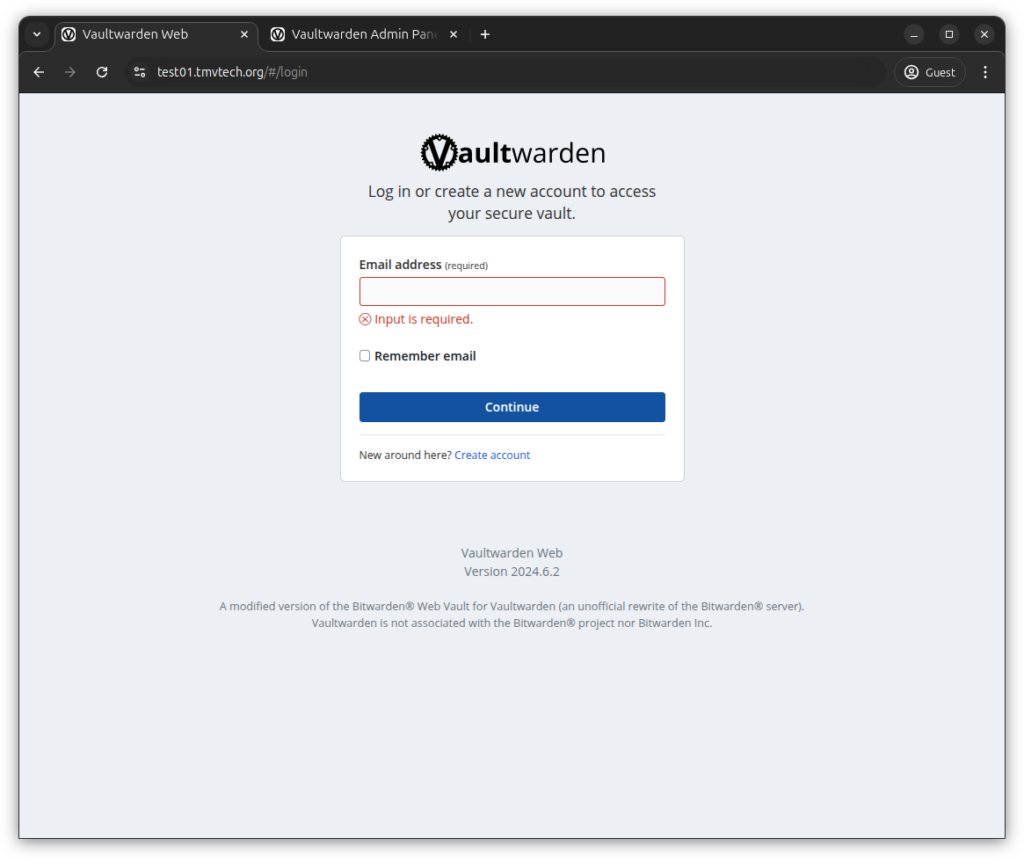
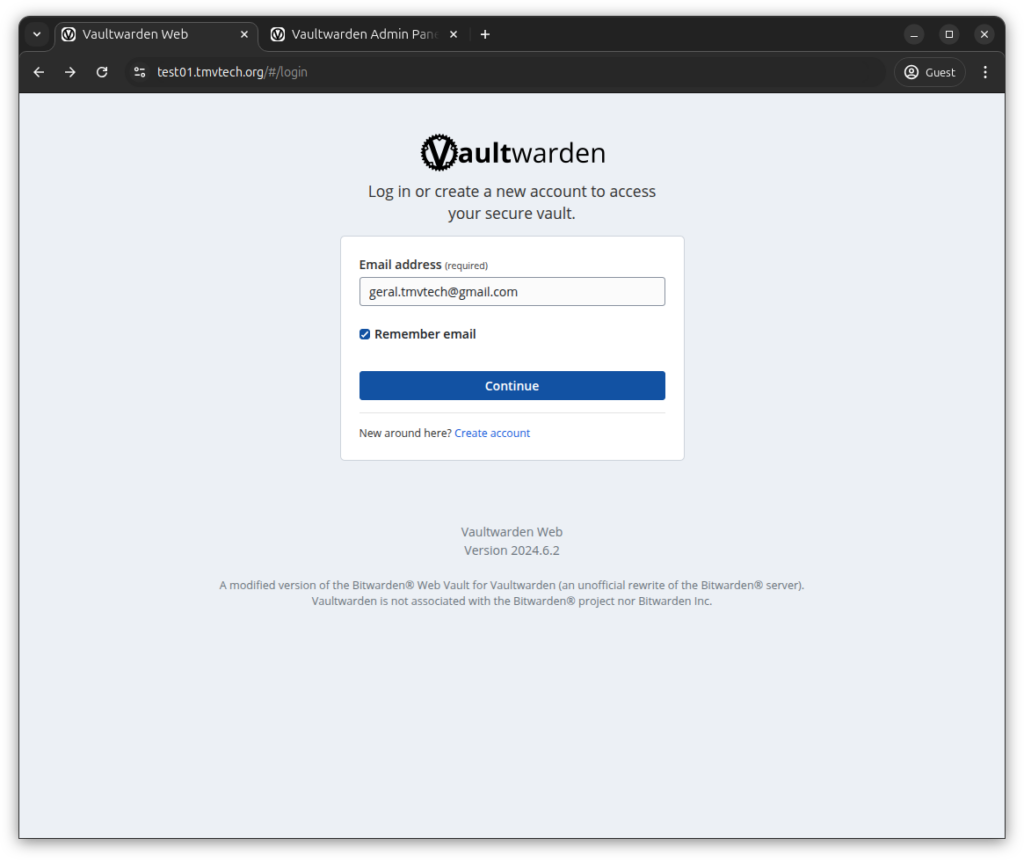
Once the container starts up, go to your browser and access the address below. You will be greeted with a login screen.
https://pwd.example.com
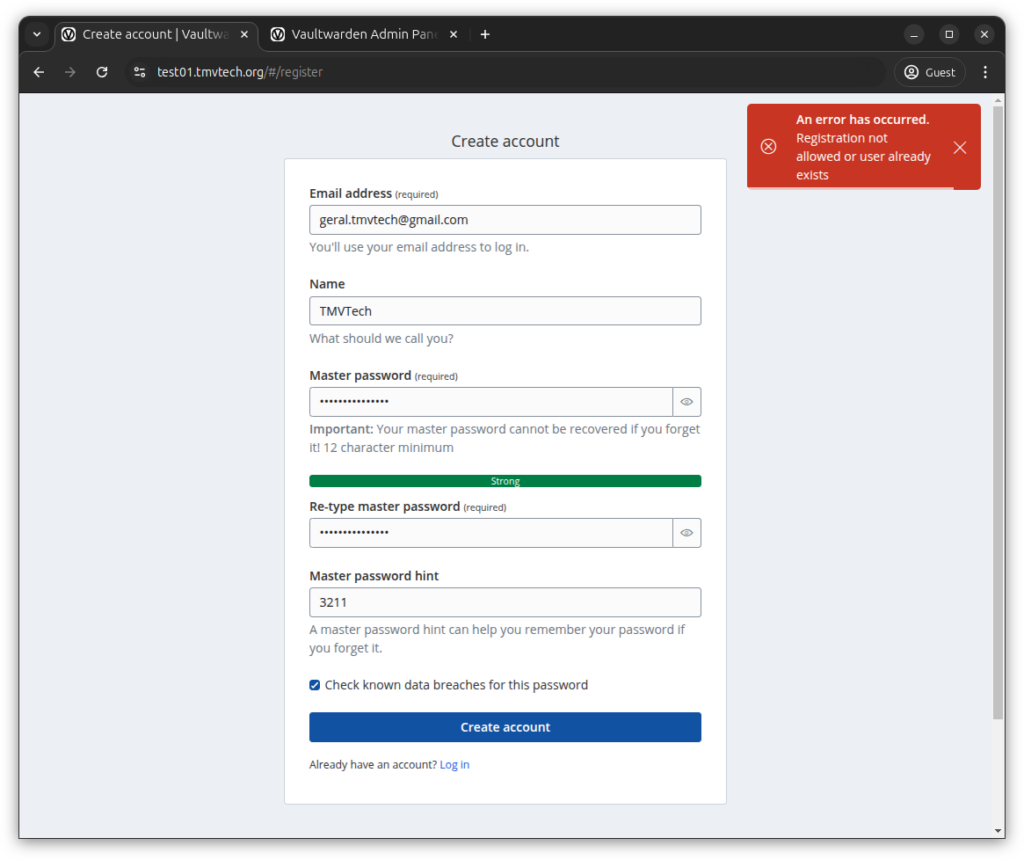
If you try to create an account, you will be told that either the email is already being used or sign ups are disabled (which is the case).
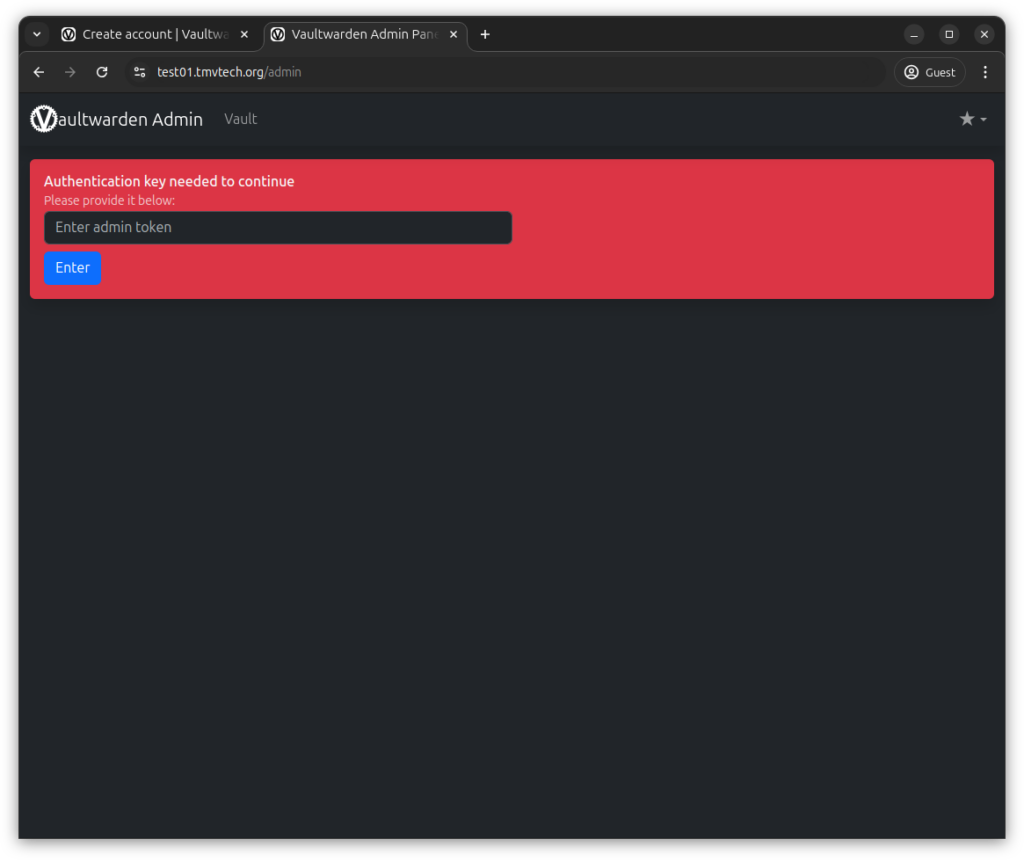
To be able to create an account with sign ups disabled we need to access the admin panel you can do it with an url like the one below. In this page you will need to use your admin password to log in (the one set in the docker compose file).
https://pwd.example.com/admin
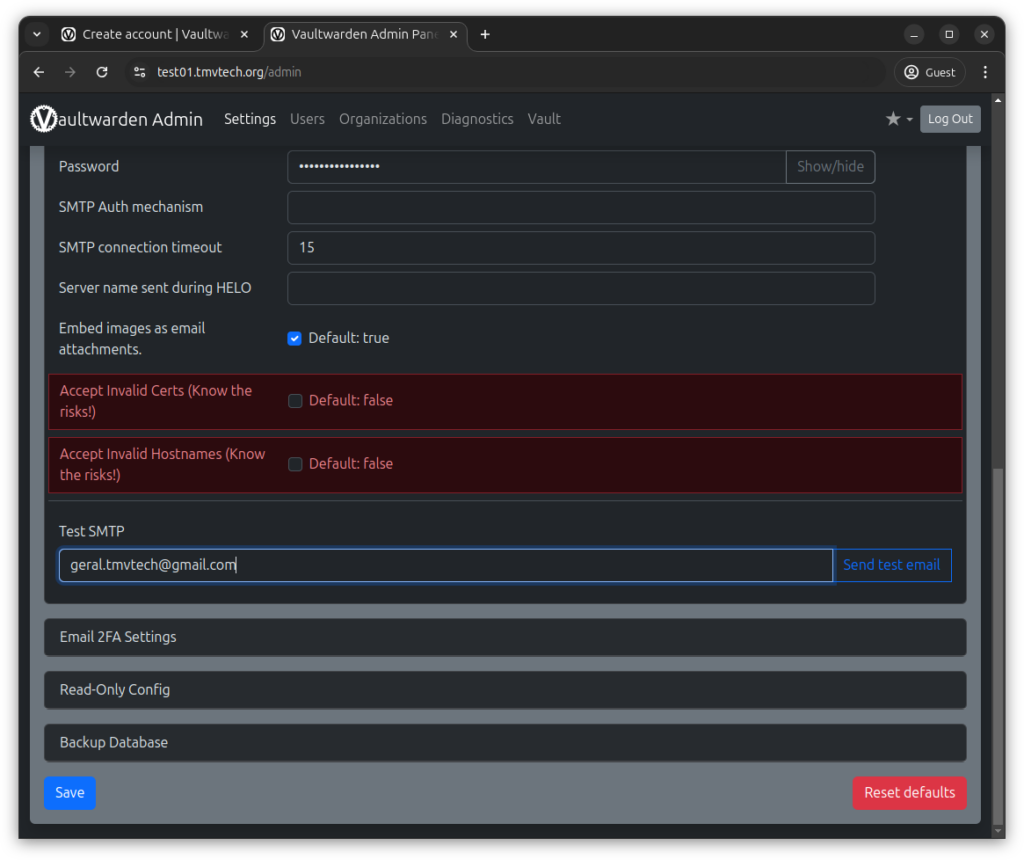
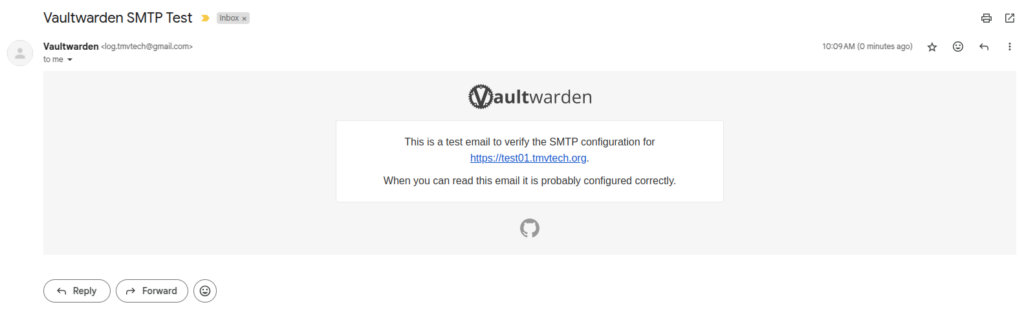
In this page scroll down until you see ‘SMTP Settings’, open that tab and scroll until the end of it, in here you will need to test SMTP by inputing one of your emails and pressing ‘Send Test Email’.
On your email you should’ve gotten an email similar to this one, if you didn’t, make sure all your SMTP credentials in the docker compose file are correct:
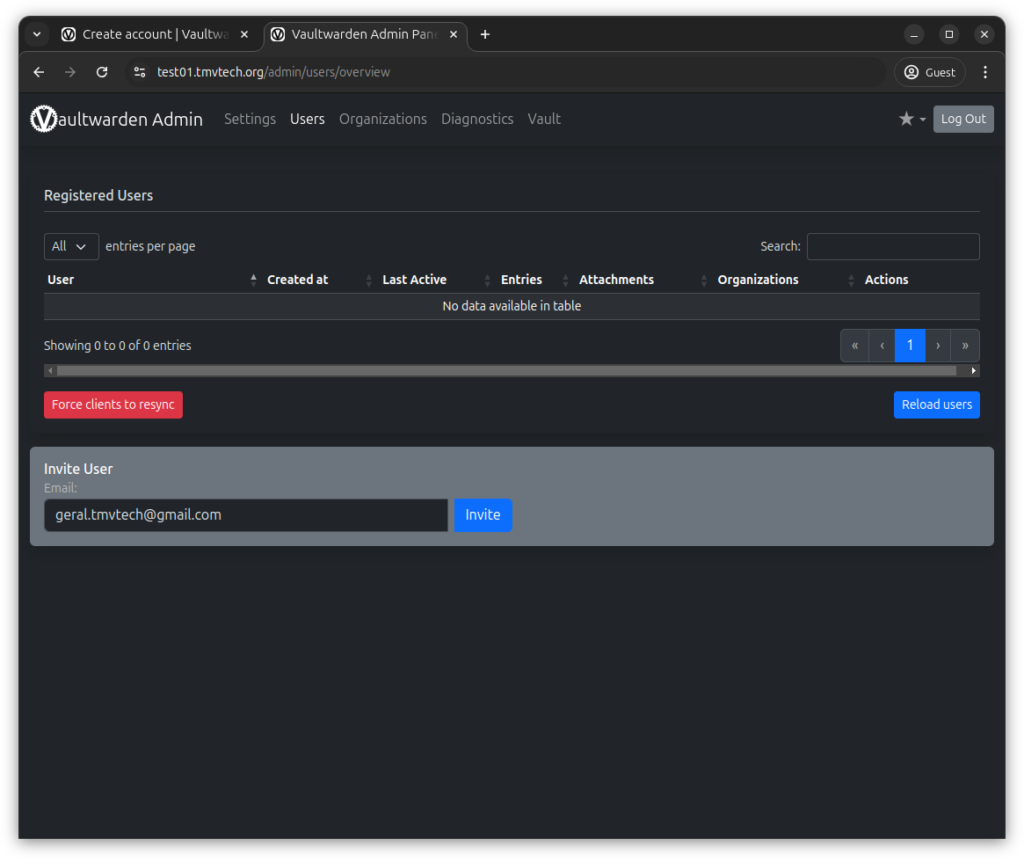
You can now go to the ‘Users’ tab at the top of the page, and then invite yourself.
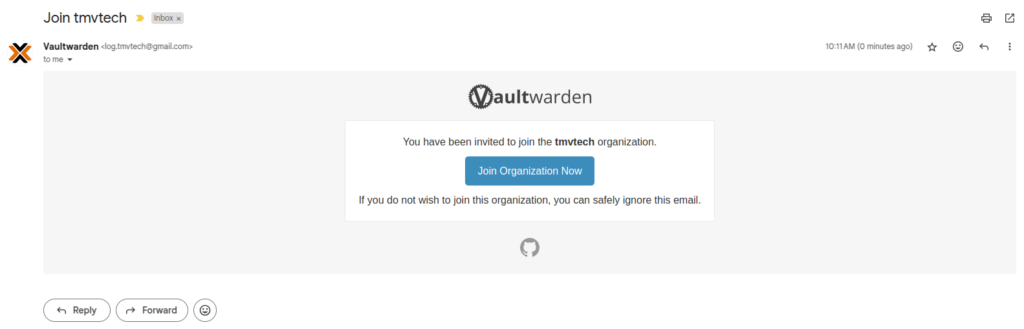
On your email you should’ve gotten an email similar to this one, press the blue ‘Join Organization Now’ button:
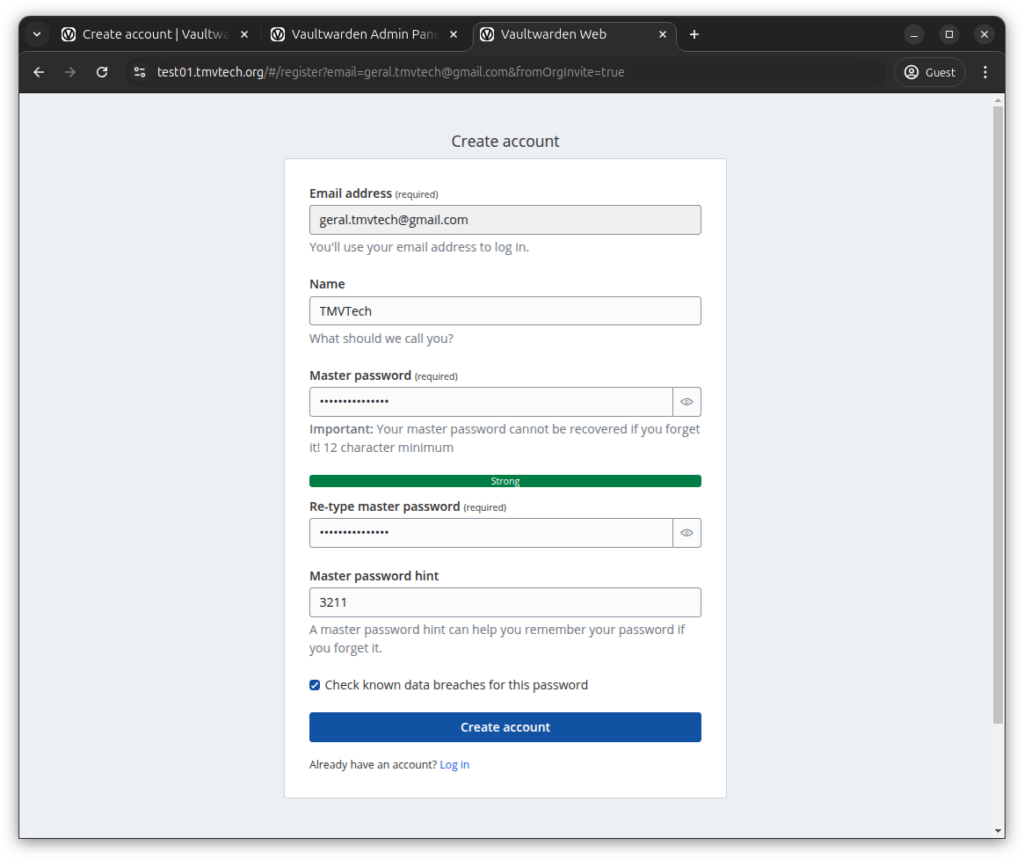
After inputing all your credentials press the ‘Create Account’ button.
Make sure you remember your master password as it is the one you need to access all your other ones.
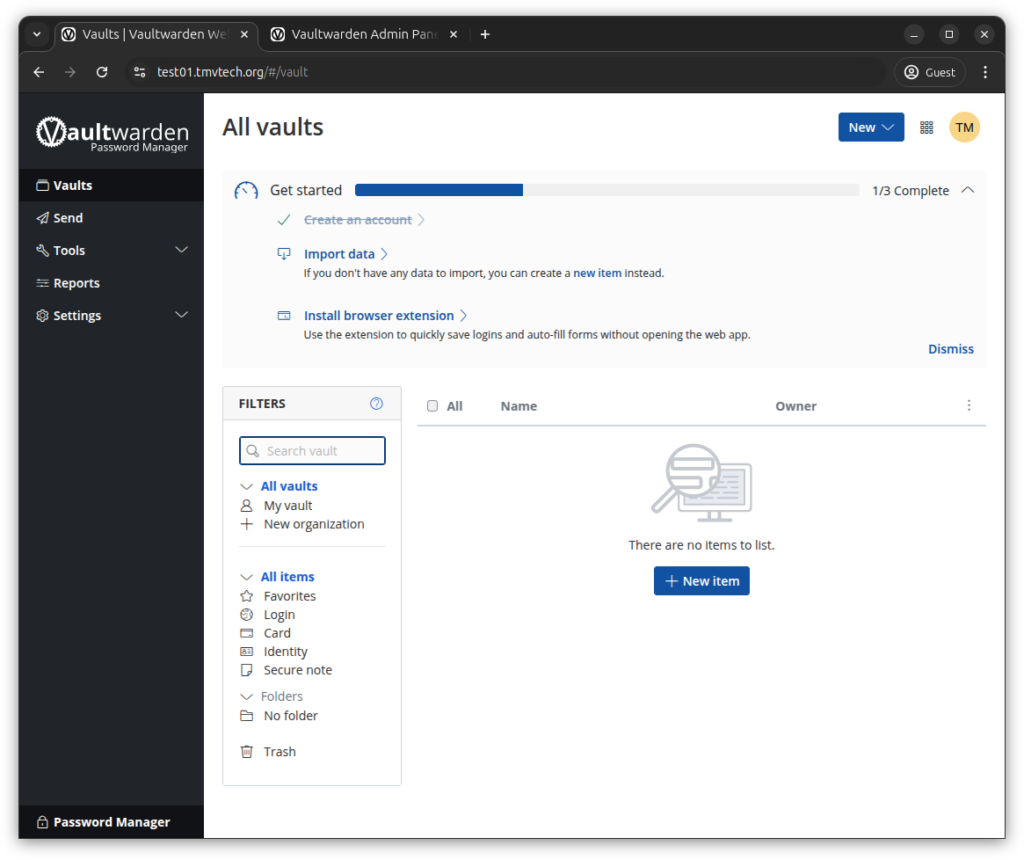
After registering, you can log in with the email and password you just created.
And that’s it, you can now click on ‘Install browser extension’ to install the Bitwarden Client in your browser or you can also set it up on your phone or pc.
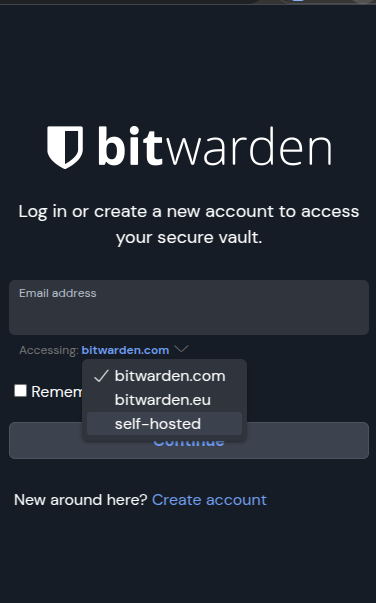
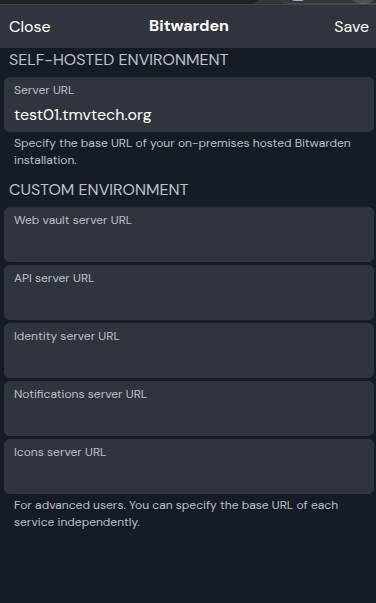
On the browser extension, you can click on the small blue text saying ‘Accessing:’ and change it to self-hosted, then input your server URL and click save. Click on ‘Close’ to go back and log in:
And that’s it, you should now have a new, self-hosted, password manager! Thanks for reading and stay tuned for more tech insights and tutorials. Until next time, and keep exploring the world of tech!